
HOW TO INSTALL A BUNNINGS EXCLUSIVE PRE-HUNG ALUMINIUM EXTERIOR DOOR
Bunnings are now selling the complete door solution [Pre-finished Door & Frame + Hardware] – no need to find frame or choose hardware. These doors, handles and frames come as a complete package and are ready to install yourself following these simple steps.
Once you have purchased your pre-hung door you can start your DIY project but first you need to ensure you have everything you need.
What you need:
- 4mm Wood Drill Bit
- 6mm Concrete Drill bit
- No.3 Square Driver
- Hex Driver
- 1 metre minimum Spirit Level
- Electric Drill
- MS Coloured Sealant
1. Check the size of the door to your opening is going to work before unpacking.
810 Door – Minimum to maximum hole size 2055-2065 x 885 – 905mm
860 Door – Minimum to maximum hole size 2055-2065 x 935 – 955mm

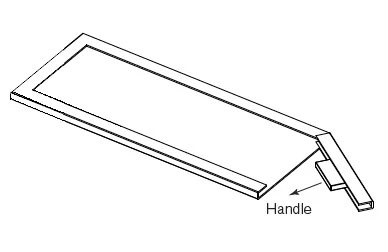
2. Carefully lay door down on table or saw-horse and remove packaging, checking there is no damage to door and frame. Carefully take handle package from out of the top of the door packaging.
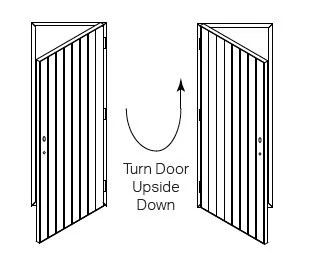
3. Decide what side you want the hinges to be on, this will swing the door to the left or to the right (door always opening inside the building). You can change this by turning the door frame upside down.
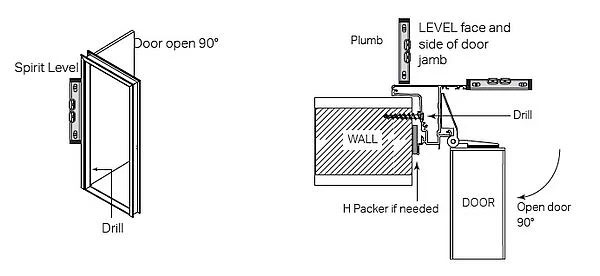
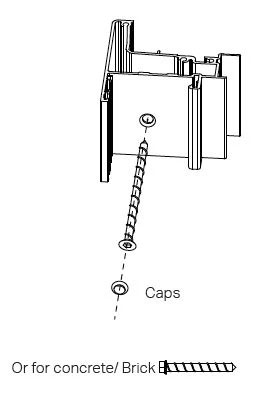
4. Place the door into the opening (”Outside” sticker to outside) Open door out 90º putting a packer under the door to take the weight. Place spirit level onto jamb FACE checking that it’s plumb. Drill 4mm hole into timber framing through fixing hole provided on the hinge side of frame first. (If concrete or brick use 6mm masonry drill). Then start by screwing (AA-Timber or AA-Concrete screws) in the
top and bottom holes on frame side first. Don’t wind them right in till you have double checked that the
jamb EDGE is plumb. You may need H packers to pack out the jamb from the wall to be able to plumb the jamb
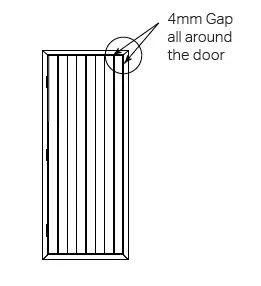
5. With door shut, check that the clearance around the door is right (should be 4mm gap all sides of door and jamb) and check that the door is sealing against rubber seal. After opening door again, drill 4mm hole into timber framing through fixing hole provided on the lock side of frame. (If concrete
or brick 6mm use masonry drill). Then start by screwing in the top and bottom screws on this side. Don’t wind them right in till you have double checked that the jamb EDGE is plumb. You may need H packers to pack out the jamb from the wall to be able to plumb the jamb.
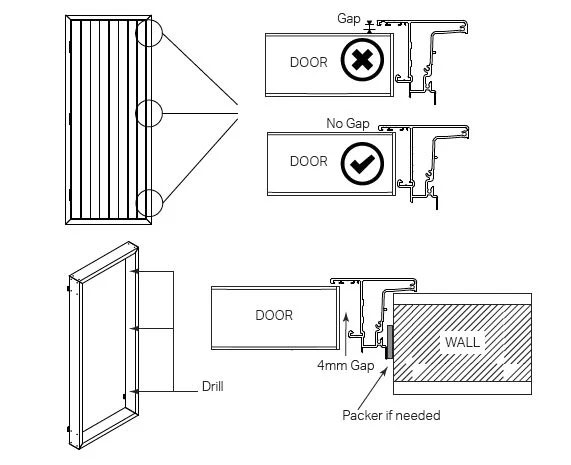
6. Before screwing in all fixings, check that the door gap of 4mm is even right around the door. If it isn’t you need to unwind the fixing at that point and take out or put extra packers in before doing fixing back up. Finally make sure all fixings are done up tight.
7. Put caps in jamb over fixing holes.
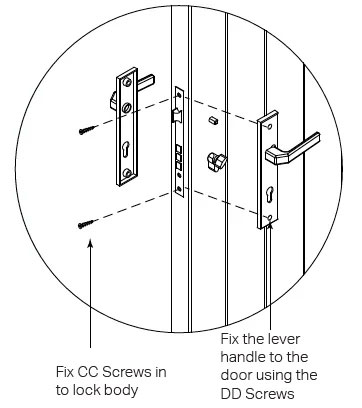
8. Depending on what way the door swings, you may need to take the lock body out by un-screwing CC screws and turning it upside down. The cylinder hole, (the oval hole in the lock body) needs to be at the bottom.
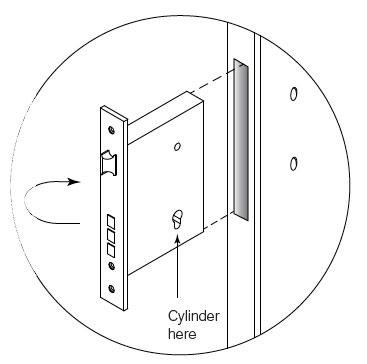
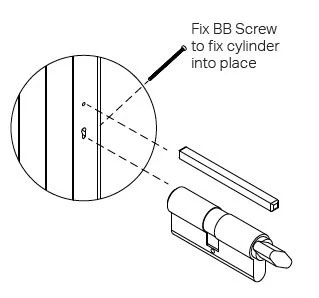
9. Place cylinder into bottom lock body hole and fix in place with BB screw. Then slide spindle into top lock body hole.
10. Using DD screws fix the lever handle onto the spindle and the cylinder each side of the door. Use CC Screws to fix lock body in place.
11. Push in the PEF backing rod behind jamb and wall to stop wind, top and bottom and sides.
12. Seal using MS coloured sealant down the FACE edge of jamb and your wall
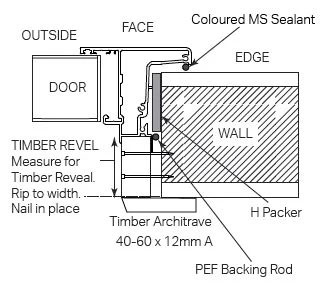
13. Measure between the edge of the jamb and the wall to work out the width the timber reveal needs to be, and cut this to width, fixing it into the jamb and nailing it to your wall. Followed by cutting and fixing the architraves.
Now that you have installed your beautiful new Parkwood door, why not continue to boost your curb appeal with helpful planner:
Renovate your Entrance way with this tool [Free Excel Template]